
Installing an outdoor chandelier on a covered porch is safest when you nail two fundamentals: the right hanging height for clearance and the right wiring basics for a weather-aware connection.
To begin, this guide shows you how to plan, measure, and mount a porch chandelier without guessing. Next, you’ll learn what makes a chandelier truly “outdoor-safe” for a covered porch so you choose the correct rating, materials, and placement before you ever touch a wire.
After that, we’ll cover the support side: the electrical box and bracing that must hold the fixture’s weight (and handle porch vibration and breeze) so the chandelier stays stable and secure.
Below, you’ll get a step-by-step installation sequence, plus quick troubleshooting for sway and flicker so you can finish with a fixture that looks intentional, lights evenly, and stays reliable through changing seasons.
What makes an outdoor chandelier safe for a covered porch?
An outdoor chandelier is safe for a covered porch when it’s designed for the right exposure level, uses corrosion-resistant materials, and installs with protected connections so moisture, airflow, and temperature swings don’t compromise the fixture or wiring.
To connect this definition to real homes, think of a covered porch as a “middle zone”: it’s more protected than open yard lighting, but it’s still exposed to humidity, wind-driven rain at the edges, insects, and seasonal temperature shifts. That’s why “outdoor-safe” is not just about style it’s about rating, materials, and how well the canopy and wiring are sheltered once installed.

Is a damp-rated chandelier enough for a covered porch?
Yes, a damp-rated chandelier is often enough for a covered porch because (1) the roof reduces direct rainfall on the fixture, (2) damp ratings are designed to handle humidity and indirect moisture, and (3) covered porches typically keep electrical connections more sheltered than fully exposed locations.
However, “covered” doesn’t always mean “dry.” If your chandelier sits near the porch edge, faces prevailing wind, or could be hit by wind-driven rain (or splash from steps/railings), you may need a more robust rating or more weatherproof installation details. In other words, match the fixture rating to the most exposed realistic condition not to the best-case day.
What materials and finishes last longest outdoors (especially near the coast)?
There are 5 main material/finish groups that affect outdoor longevity: (1) powder-coated metals, (2) stainless steel or marine-grade hardware, (3) brass or copper alloys, (4) aluminum bodies with sealed coatings, and (5) weather-resistant synthetic shades because each category fights corrosion differently.
To choose faster, use this simple durability lens: “How does this surface behave when exposed to humidity, salt, and UV for years?” Specifically:
- Powder-coated steel/aluminum: great everyday durability; scratches should be touched up to prevent rust creep.
- Stainless hardware: strong against corrosion; verify outdoor-grade fasteners to avoid mixed-metal rust spots.
- Brass/copper: naturally corrosion-resistant; expect patina (a design feature, not a failure).
- Painted finishes: can look beautiful but may need more maintenance in humid climates.
- Woven looks (rattan-style): choose outdoor-rated synthetics if the porch gets humidity and insects.
If you live in a coastal area, durability often comes down to two habits: pick corrosion-resistant hardware and
wipe down the fixture periodically to remove salt residue before it sits and eats at the finish.
How high should you hang an outdoor chandelier on a covered porch?
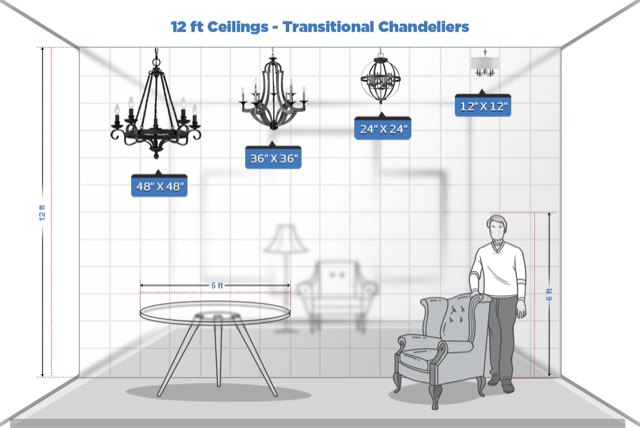
You should hang an outdoor chandelier high enough to maintain safe clearance and comfortable sightlines then adjust based on whether it’s over a porch dining table or in an entry/walkway zone because function (headroom) and proportion (visual balance) must both be correct.
To begin, set height using the “bottom of fixture” as your reference point. That’s the lowest physical part people might bump into or see at eye level. Next, decide which zone you’re lighting: a dining zone supports a lower, more intimate drop; a walkway demands more clearance to prevent head bumps and door conflicts.

Should you use a different hanging height over a porch dining table vs an entryway?
A chandelier over a porch dining table wins on intimate illumination and visual anchoring, while a chandelier in an entryway/walkway is better for head clearance and open sightlines so you should use different hanging heights depending on the zone. To make this practical, use two quick starting rules:
- Over a porch dining table: aim for a lower drop that frames the table as the “center of the scene,” while keeping the fixture safely out of reach when standing.
- In an entry/walkway: aim for a higher drop so adults can pass under comfortably and the door swing never hits the chandelier.
In other words, the “right” height is not a single number it’s the best balance between clearance and atmosphere for how your porch is actually used.
Can an outdoor chandelier hang too low on a porch?
Yes, an outdoor chandelier can hang too low because (1) it increases head-bump risk in a high-traffic porch, (2) it can interfere with door swing or tall guests carrying packages, and (3) it’s more likely to sway and contact people or furniture in windy conditions.
To fix “too low” quickly, start with the least invasive change first:
- Shorten the chain/rod drop and re-check clearance.
- Re-center the fixture away from doors or the porch edge where wind is stronger.
- Switch to a more compact chandelier if the porch ceiling height is limited.
If the porch is exposed to gusts, a fixture that sits too low can feel unstable even when the mounting is solid. In that case, height and sway control work together (covered later in the mistakes section).
What electrical box and support do you need to hang an outdoor chandelier securely?
You need an electrical box and support system that is rated for the chandelier’s weight and securely fastened to structure (joist or brace), because the box must carry the load not just hide the wires.
To connect that to what homeowners see on install day: a chandelier may look “light,” but once it’s hanging, its weight pulls continuously on the mounting point. Add porch vibration, door slams, and occasional breezes, and you get repeated micro-movement. Therefore, support is a safety requirement, not a cosmetic detail.

Do you need a fan-rated or heavy-duty electrical box for a chandelier?
Yes, you often need a fan-rated or heavy-duty box for a chandelier because (1) chandeliers can be heavier than standard lights, (2) porch conditions may add movement and stress over time, and (3) a rated box and brace reduce the risk of loosening, sagging, or failure.
However, “fan-rated” is not the only acceptable path what matters is that the box and mounting method are rated for the specific load. If you cannot confirm the existing box is rated and securely braced, treat that as a stop sign and upgrade the support before hanging the chandelier.
What are the key parts of the mounting system (and what does each do)?
There are 7 key parts of a chandelier mounting system each with a specific job: (1) electrical box, (2) brace/joist attachment, (3) mounting bracket/crossbar, (4) threaded nipple/hardware, (5) canopy, (6) chain/rod and connection links, and (7) strain relief/cord management because a “complete system” shares load and protects
wiring.
To make the meronymy (parts → whole) actionable, here’s what each part does and what goes wrong when it’s wrong:
- Electrical box: supports and contains connections. If underrated, it can crack, loosen, or pull out.
- Brace/joist attachment: transfers weight to framing. If absent, screws may only bite into thin material and fail.
- Mounting bracket/crossbar: provides a stable interface. If bent or loose, the chandelier tilts and stresses wires.
- Threaded hardware: locks the canopy and fixture. If undersized, it can loosen with vibration.
- Canopy: covers wiring and helps protect connections. If gaps exist, moisture and insects can enter.
- Chain/rod links: set drop height. If poorly connected, the fixture may sway excessively or sit unevenly.
- Strain relief: prevents cord tension on wire connections. Without it, tugging can loosen wire nuts over time.
The key mindset: outdoors, every small looseness becomes a bigger issue over time. A secure mount today is what prevents flicker, sway, and corrosion-driven failure later.
What wiring basics should you understand before installing an outdoor chandelier?
Wiring basics for an outdoor chandelier are understanding hot, neutral, and ground, confirming the power is truly off, and keeping connections protected inside the canopy because outdoor conditions increase the risk of corrosion and intermittent electrical faults.
To begin safely, treat every wire as live until you prove it’s not. Turn off the correct breaker, then verify with a tester before touching conductors. Next, focus on clean, secure connections: tight wire nuts, correct grounding, and no exposed copper outside connectors.
Do you need a GFCI for a covered-porch chandelier circuit?
Yes, you often need GFCI protection for a covered-porch chandelier circuit because (1) exterior circuits are more likely to experience moisture-related leakage, (2) GFCI reduces shock risk in damp environments, and (3) outdoor-rated electrical protection is a common safety expectation in many jurisdictions.
However, the exact requirements can depend on your home’s wiring, local code, and whether the circuit is considered exterior/porch lighting. If you’re unsure how your porch lighting is protected, consider consulting a licensed electrician to verify compliance and safety before installation.
Outdoor chandelier wiring vs indoor wiring: what’s different?
Outdoor chandelier wiring wins on moisture-awareness, while indoor wiring is optimized for dry, stable conditions so outdoor installs demand extra attention to protected connections, corrosion resistance, and sealing at the canopy.
Specifically, outdoor installs often require:
- Better protection of wire connections: keep all splices inside the rated box/canopy and protected from condensation.
- Corrosion resistance: hardware and ground connections should resist rust to maintain continuity over time.
- Canopy sealing: reduce gaps where moisture and insects can enter (while still following manufacturer instructions).
- Movement tolerance: slight sway can stress connections, so strain relief and secure fastening matter more.
The goal is not to “overcomplicate” wiring it’s to prevent the outdoor environment from turning small weaknesses into future faults.
How do you install an outdoor chandelier on a covered porch step-by-step?
Install an outdoor chandelier using a clear method with 6 stages plan and measure, shut off power, confirm box/support, set hanging height, make wiring connections, and test/finish so the fixture ends up safe, level, and weather-aware.
To keep the process smooth, follow an order that protects you from the two biggest risks: (1) electrical shock from assuming power is off, and (2) mechanical failure from hanging weight on an unrated box.
Below is the workflow that minimizes both.
What tools and materials do you need before you start?
There are 4 tool groups you need: (1) safety and testing, (2) access and support, (3) electrical hand tools, and (4) alignment and finishing because outdoor chandelier installs require both safe wiring and stable mounting.
Specifically, gather:
- Safety/testing: non-contact voltage tester, work gloves, safety glasses
- Access/support: stable ladder, helper (recommended for heavier fixtures)
- Electrical tools: screwdriver set, wire strippers, wire nuts/connectors, electrical tape (as needed)
- Alignment/finishing: tape measure, level, pencil/marker, optional canopy gasket/seal (if manufacturer allows)
If your chandelier is heavy or your porch ceiling is high, a helper dramatically reduces risk during the lift and canopy attachment.
What is the safest installation sequence from power-off to final test?
The safest installation sequence is: turn off the breaker, verify no voltage, confirm box/bracing, mount the bracket,
set chain/rod length, connect hot/neutral/ground, secure the canopy, level the chandelier, then restore power and test so
you eliminate shock risk first and load risk second.
To begin, follow this step-by-step checklist:
- Plan placement and height: mark the center point and determine safe clearance for the zone (dining vs walkway).
- Turn off power at the breaker: label the breaker if needed for future reference.
- Verify power is off: test at the fixture location before touching wires.
- Inspect the electrical box and support: confirm it is secure and rated for the fixture load; upgrade bracing if needed.
- Install the mounting bracket/crossbar: tighten hardware to prevent future movement.
- Set the chandelier drop: adjust chain/rod length so the bottom of the fixture lands at your target height.
- Make wiring connections: connect hot-to-hot, neutral-to-neutral, and attach ground securely to the box/fixture grounding point.
- Tuck wires neatly into the box: avoid pinching conductors; keep splices protected inside the canopy.
- Secure the canopy: ensure it seats properly and feels stable, then level the fixture.
- Restore power and test: confirm stable operation; test dimming if applicable.
Decision point: if you discover damaged insulation, unclear wiring colors, no grounding, an unstable box, or you’re unsure about exterior circuit protection, stop and bring in a licensed electrician. That choice protects both safety and the fixture warranty.
What are the most common outdoor chandelier installation mistakes and how do you fix them?
There are 5 common outdoor chandelier mistakes wrong height, weak support, poor sealing, loose connections, and wind sway and you fix them fastest by diagnosing the symptom first, then correcting the single root cause rather than redoing the entire installation.
Next, use a “symptom → cause → fix” approach. Outdoor conditions amplify small problems, so catching issues early prevents long-term damage. The goal is not perfection on day one it’s stable, safe performance over time.
Is it normal for an outdoor chandelier to sway in the wind?
Yes, mild sway can be normal because (1) porches experience air movement even when covered, (2) longer chains act like a pendulum, and (3) lighter fixtures have less inertia and move more easily.
However, sway becomes a problem when it causes the chandelier to bump into anything, stresses the canopy/wiring over time, or looks unstable.
To fix it:
- Shorten the drop (less pendulum effect).
- Re-check mounting tightness (loose bracket exaggerates movement).
- Relocate slightly inward from the porch edge where wind funnels.
- Use a stabilizer (only if manufacturer-approved and appropriate for the design).
Why does an outdoor chandelier flicker or trip the circuit after installation?
Flicker or tripping after installation is typically caused by loose wire connections, moisture intrusion, incompatible dimming/LED components, or an overloaded/compromised circuit because outdoor environments and vibration can expose weak connections faster than indoor installs.
To diagnose safely, start with the simplest and safest checks:
- Rule out bulb issues: use a known-good bulb or confirm the LED is compatible with the fixture/dimmer.
- Check dimmer compatibility: flicker often occurs when a non-dimmable LED is paired with a dimmer.
- Inspect for moisture paths: look for gaps at the canopy edge where wind-driven moisture could enter.
- Suspect loose splices: loose wire nuts can cause intermittent contact (turn off power before opening the canopy).
Safety note: if a breaker trips repeatedly, do not keep resetting it. Turn the circuit off and consult an electrician, especially if moisture could be involved. Repeated tripping can signal a fault that should be corrected, not ignored.
Source:
- https://imgs.search.brave.com/vSE1pXp6KAGw59qYUmPoxNTMskeV-DmslKazV__sT_E/rs:fit:860:0:0:0/g:ce/aHR0cHM6Ly90aHVt/YnMuZHJlYW1zdGlt/ZS5jb20vYi9lbGVj/dHJpY2FsLWluc3Ry/dW1lbnQtdG9vbHMt/MjEyNTIzNzcuanBn
- https://images.unsplash.com/photo-1449247709967-d4461a6a6103?auto=format&fit=crop&w=1600&q=70
- https://imgs.search.brave.com/1XD-g2HfgmpBSIZWZflizbIIWYnYDfL47edn4fDljik/rs:fit:860:0:0:0/g:ce/aHR0cHM6Ly93d3cu/ZmFtaWx5aGFuZHlt/YW4uY29tL3dwLWNv/bnRlbnQvdXBsb2Fk/cy8yMDE4LzA2L3No/dXR0ZXJzdG9ja181/ODQxMDkyODAtbWVh/c3VyZS5qcGc_Zml0/PTY5Niw2OTY
- https://www.hkinteriors.com/wp-content/uploads/2019/03/PastedGraphic-7.jpg
Articles on the same topic:
-

How to Remove a Fluorescent Light Cover (Lens) Safely: Tabs, Clips, and Sliding Diffusers
-

How Many Pendant Lights Over a 5 Foot Island? The Definitive Spacing & Sizing Guide
-

Set the Perfect Chandelier Height Above Dining Table: Inches, Ceiling Rules & Sightlines
-

How to Add Lighting to a Room Without Wiring With 10 Smart Solutions
-
What Is Scandinavian Design and What Makes This Style So Distinctive
-

Feng Shui Bedroom Decor Ideas for Better Sleep