If you want beautiful overhead light without touching wiring, you can hang a swag light by anchoring a ceiling hook, setting the right height, and routing the plug-in cord neatly to an outlet no junction box required. This guide walks you through the safest, simplest way to do it.
instead of temporary, especially in rentals.To get started, follow the sections in order: definition first, then a hardware checklist, then placement, then the step-by-step install, and finally
renter-safe options and upgrades that make the cord disappear.
What is a swag light (plug-in pendant), and how is it different from a hardwired pendant?
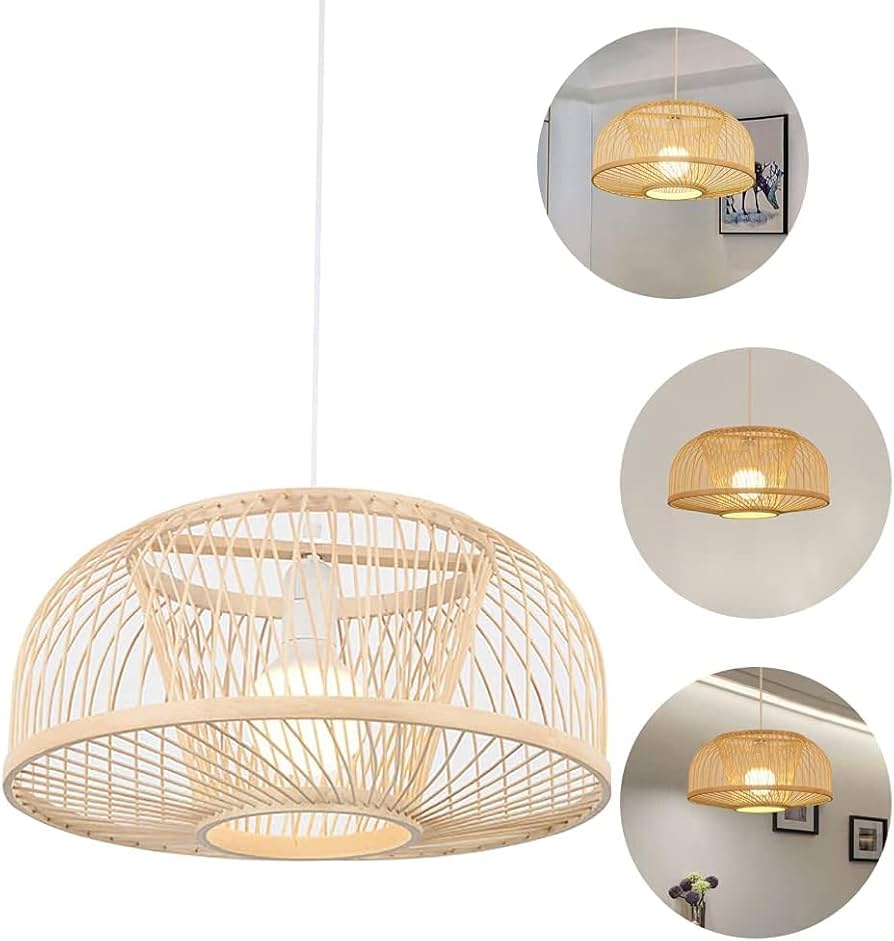
A swag light is a plug-in pendant that hangs from a ceiling hook and uses a long cord draped (“swagged”) to a wall outlet, giving you overhead lighting without permanent wiring.
To keep the flow clear, let’s define the key terms and then compare what changes when a light is hardwired versus plug-in.
Is a swag light the same thing as a plug-in pendant?
Yes, a swag light is often the same as a plug-in pendant, because both plug into an outlet
but “swag light” specifically emphasizes the draped cord route (up to a hook, then down a wall) as a design and placement feature.
In other words, “plug-in pendant” is the broader label, while “swag light” is the style of installation that makes placement flexible.
- Plug-in pendant (broader): any pendant with a plug cord
- Swag light (narrower): a plug-in pendant plus cord draped via hooks for positioning and aesthetics
Do you need an electrician to hang a swag light without hardwiring?
No, you usually don’t need an electrician to hang a swag light without hardwiring for three reasons:
(1) you’re not altering electrical wiring, (2) the fixture is powered by a standard outlet, and (3) a properly rated hook/anchor provides the support.
However, if your ceiling material is unusual, the fixture is heavy, or the outlet/switch situation seems unsafe, professional advice is still smart.
What tools and hardware do you need to hang a swag light safely?
There are 3 main groups you need: mounting hardware, cord management, and
basic tools/safety gear and choosing the right ones prevents sagging, wobbling, and wall damage.
Now that you know what a swag light is, the next step is building a simple checklist so installation feels straightforward instead of guessy.

Which ceiling hook and anchor should you choose for your ceiling type and fixture weight?
A joist-mounted screw hook wins for strength, a drywall anchor hook is best for lighter fixtures, and a toggle bolt is the safest upgrade when there’s no joist because each option trades off convenience, holding power, and ceiling repair risk.
To choose confidently, match the solution to your ceiling condition:
- Best case: Joist/beam available use a screw hook directly into the joist for maximum support.
- Common rental case: Drywall ceiling, no joist at exact spot use a rated drywall anchor for lightweight fixtures only.
- Safer “no-joist” option use a toggle bolt anchor to spread load behind drywall (more secure for moderate weight).
Tip: Always check the fixture weight (or estimate) and keep a safety margin. Your specific piece could be heavier depending on shade and materials.
Do you need a swag kit, or can you use a standard plug-in pendant?
A swag kit wins for flexibility, a standard plug-in pendant wins for simplicity, and a conversion kit is best when you’re adapting an existing shade/fixture because each one solves a different setup problem.
- Choose a standard plug-in pendant if you already have a good ceiling location and only need one hook.
- Choose a swag kit if you need extra cord length, multiple hook points, or fine-tuned positioning.
- Choose a conversion kit if you’re turning a shade or hardwired-style pendant into a plug-in look (covered later).
How do you choose the best hanging location and height for a swag light?
You choose the best location by following three rules: stay near an outlet, hang at task-appropriate height, and route the cord away from walkways and doors so it looks clean and stays safe.
Next, you’ll map the cord path first because cord routing often determines placement more than aesthetics.
What is the ideal hanging height for a plug-in pendant over a table, nightstand, or reading chair?
There are 3 common height targets over tables, bedside, and reading corners based on sightlines and comfort.
Use these as starting points (then adjust visually):
- Over a dining table: start around 30-36 inches above the table depending on shade size and room scale.
- Over a nightstand: hang lower than dining height so the light feels intimate and functional for reading.
- Over a reading chair: center the light to illuminate the reading area, not your eyes.
If you’re unsure, use painter’s tape to “mock” the cord line on the ceiling/wall and test from across the room before drilling.
Should you swag the cord across the ceiling or down the wall?
Ceiling routing wins for centered placement, wall routing wins for a tidy vertical line, and
a hybrid route is best when the outlet is off to one side because the best choice depends on how visible you want the cord to be.
- Across the ceiling: best when you want the light centered above furniture.
- Down the wall: best when you can align it with corners or trim.
- Hybrid: short ceiling run + clean wall drop using a cord cover.
Safety note: avoid routing cords through active doorways. A university safety incident report described an extension cord damaged by repeated door use that started a small fire good proof that cords and doors don’t mix.
How do you hang a swag light without hardwiring (step-by-step)?
The best method is a 7-step install: plan the route, locate a joist (or choose the right anchor),
install a rated hook, hang and level the pendant, secure the cord path, and do a stability test so the light looks built-in and stays safe.
Now that you’ve chosen placement and gathered hardware, follow these steps in order for the smoothest install.

- Turn off and clear the area: You’re not wiring anything, but you’ll use a ladder remove tripping hazards.
- Mark your pendant “drop point”: Stand where the light should hang and mark the ceiling lightly in pencil.
- Map the cord route to the outlet: Decide your ceiling/wall route (use tape to visualize).
- Find a joist (preferred) or confirm your anchor plan: Joists are stronger; anchors must be weight-rated.
- Install the ceiling hook: Pilot hole into joist, or install the right anchor/toggle for drywall.
- Hang the light and adjust height: Set the height, check sightlines, ensure strain relief (no sharp bends pulling the cord).
- Secure and tidy the cord path: Use clips or a paintable raceway; keep the cord away from doors and walkways.
Can you hang it into a joist, and how do you find one?
Yes, and you should aim for a joist because it provides the strongest hold, reduces wobble, and lowers the chance of ceiling damage over time.
To find a joist:
- Use a stud finder (quickest)
- Look for ceiling features that suggest framing lines
- Tap-test can help confirm but is less reliable
Evidence note: According to a University of Queensland research summary (Faculty of Medicine, June 2020), half of ladder fallers experienced a decline in psychological wellbeing for at least six months so treat ladder work seriously.
What do you do if there is no joist where you need the hook?
Yes, you can still hang a swag light without a joist, but you must do three things:
(1) use a correctly rated anchor (often toggle style), (2) keep the fixture lightweight, and (3) test stability before finishing.
Next, treat “no joist” as a design constraint: shift the hook point slightly and use swag routing to place the pendant where you want it.
- Prefer toggle-style anchors for better support behind drywall
- Don’t exceed the anchor’s rated load
- Avoid over-tightening and crushing drywall
How do you route the cord neatly to the outlet and manage slack?
You route the cord neatly by using a planned path + fixed attachment points + a clean cover,
which prevents drooping lines and reduces snag risks.
- Create a straight “visual line” down the wall (corners/trim help)
- Use cord clips every 12–18 inches
- Hide slack with a cord cover or decorative wrap
- Keep cords away from walkways and doors
Evidence note: A university EHS bulletin described a cord through an active doorway that became damaged and caused a fire reinforcing that cord routing is safety, not just style.
How do you test stability and level the fixture before calling it done?
Yes, you should always test because a quick stability check catches weak anchors, mis-threaded hooks, and unbalanced chain length before anything falls.
- Gentle tug test: confirm the hook doesn’t shift.
- Level check: step back and confirm it hangs straight.
- 24-hour recheck: drywall anchors can settle; recheck alignment the next day.
Is hanging a swag light renter-safe and damage-minimizing?
Yes, hanging a swag light can be renter-safe and damage-minimizing for three reasons:
(1) it avoids hardwiring, (2) it can use small, patchable holes or removable cord solutions, and
(3) it allows flexible placement without altering the ceiling’s electrical box.
Next, you’ll choose between “no-drill” and “minimal-drill” approaches based on fixture weight and ceiling texture because renter-safe doesn’t always mean zero holes.
Can you do this without drilling holes at all?
Yes, sometimes, but only if three conditions are true:
(1) the fixture is very lightweight, (2) the surface is smooth and clean, and (3) the adhesive system is rated and installed correctly.
However, “no-drill” is riskier on textured ceilings, humid environments, or with heavier shades. When in doubt, a small, patchable hole with a proper anchor is often safer than adhesive failure.
How do you minimize damage and patch holes when moving out?
You minimize damage by choosing one strong mounting point, keeping holes small, and planning a clean cord route that doesn’t require lots of fasteners.
A simple move-out patch plan:
- Remove hook hardware carefully
- Fill small holes with lightweight spackle
- Sand lightly and touch up paint
- Photograph the “before/after” for your records
Evidence note: A Queensland University of Technology report noted ladder-fall hospital admissions rose over time, including a reported 47% increase in ladder-related hospitalizations in a decade-long analysis.
Source:
- https://encrypted-tbn0.gstatic.com/images?q=tbn:ANd9GcSlh17GXAW1CWGdmxMhH6JUHIn1fD2sXRtNFA&s
- https://cdn.shopify.com/s/files/1/0653/4368/4793/files/12_b9a17c34-8d07-4117-9176-a50ebee05967.webp?v=1762157728
- https://hopemiriamdesigns.com/wp-content/uploads/sites/51350/2023/05/BU1A6588_websize-683×1024.jpg
- https://m.media-amazon.com/images/I/61x9Ci-lBvS.jpg
- https://encrypted-tbn0.gstatic.com/images?q=tbn:ANd9GcQ1tcyb99cK1Fiu2_Dq4O6e7OaawmbG3rbyyw&s
- https://www.colorcord.com/cdn/shop/articles/Layer_4_f794cc70-a6c2-43c3-9faf-97ec538314ad.jpg?v=1646350115&width=1100
- https://m.media-amazon.com/images/I/61yMf2uEHHL._AC_UF894,1000_QL80_.jpg
Articles on the same topic:
-

Wiring 3 Pendants to One Junction Box: DIY Guide
-

Calculating Lumens for High Vaulted Ceilings
-

PILLAR: Ultimate Guide to Kitchen & Dining Lighting
-

When Were Chandeliers Invented? A Deep History of Luxury Lighting
-

How to Take LED Lights Off the Wall Without Damaging Your Walls
-

What Size Pendant Light for Living Room? Dimensions Height Guide