Owning a Marble Coffee Table adds timeless elegance to any home, but maintaining that pristine glow requires specialized care. This guide explains how to remove etching from marble surfaces, restore deep damage, and implement preventative measures to ensure your interior remains sophisticated and spot-free for years to come.
Step-by-Step Restoration: remove etching from marble to Moderate Etch Marks
When you notice a dull spot on your table, don’t panic. These marks are often just light etching—a chemical reaction where an acid eats the stone surface. Because marble contains calcium carbonate, any contact with acidic substances creates a chemical burn. To fix this, you must engage in a stone restoration process.
The initial preparation is the foundation of a successful repair. You must clean the etched stone thoroughly using a pH-neutral stone soap or mild dish detergent mixed with water.
Cleaning precedes repair because any lingering grit can scratch the surface during the buffing circular motion. Use a microfiber cloth to wipe away residue and ensure the stone is bone-dry before proceeding.
For the polishing technique, you will need a specialized compound such as MB-11, Lustro Italiano, or Majestic Etch Remover. These products are designed specifically for calcium carbonate based stone.
Apply a small amount of the etch remover powder to the dull spot, add a few drops of water to create a polishing paste, and prepare for mechanical buffing.
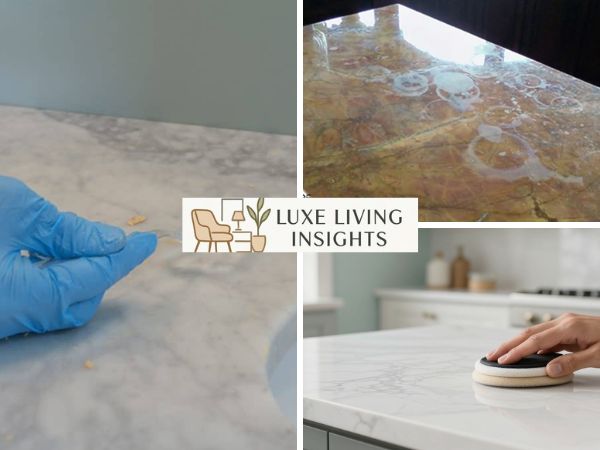
Using a microfiber cloth or felt pad, buff the area with moderate pressure for 30 to 60 seconds. This circular motion creates friction, allowing the polishing powder to restore shine to the dull spot.
After the buffing duration, use a clean rag to wipe away leftover powder. Perform a final rinsing and evaluation by drying the area to inspect the clarity. If the etch mark remains, simply repeat the process until the shine is restored.
Advanced Repair Strategies for Deep or Rough Etching
Sometimes, a spill sits for too long, and the etching removes a significant portion of the finished top layer. If the etch is deep and feels rough or pitted to the touch, a simple powder won’t suffice. You are now dealing with deep etching, which requires refinishing the surface.

The wet sanding process is the professional standard for eliminating dull spots that have structural depth. You will need diamond sanding pads or diamond abrasives. The logic is simple: diamond pads grind the damaged layer away to reveal fresh stone beneath. Start with a lower grit, typically 400-grit, to level the surface.
Just as you might need a remove a ceiling light cover with no screws diy guide when updating your room’s hardware, technical repairs on marble require specific steps.
Progressive refining is the key to a factory-finish. As you sand, the marble finish will transition from dullness to a satin glow. You must move through higher grits, eventually reaching a 3000-grit diamond abrasive. This refinishing process is labor-intensive but results in a flawless polished finish.
However, if you are uncomfortable using a variable speed electric drill with buffing pads, professional help is recommended to avoid creating an uneven surface or dips in your marble coffee table.
Essential Post-Repair Care: Re-Sealing the Surface
A common misconception is that sealers will prevent etching. In reality, a stone sealer is designed for stain prevention, not chemical resistance. Furthermore, the polishing and refinishing process actively removes sealant.
Once you have finished restoring shine, your marble is vulnerable. You must reapply a stone sealer to create a protective barrier. Choose a high-quality impregnating sealer that sinks into the pores of the stone.
Ensure the marble is completely dry; otherwise, the sealant won’t adhere properly. Regular application of a marble sealer acts as a preventative measure, buying you time to quickly wipe up stains before they penetrate.
Understanding the Science: Why Marble Coffee Tables Etch
To master marble surface repair, you must understand the calcium carbonate reaction. Marble is a calcite-based stone, meaning it is chemically sensitive to citric acid and acetic acid. When these acids touch the surface, a reaction occurs immediately.

The Common Household Culprits—which we call the Acidic Seven—include:
- Lemon Juice and Orange Juice (Citric Acid)
- Vinegar (Acetic Acid)
- Wine and Alcohol
- Tomato Sauce
- Coffee
- Harsh Cleaning Products (Bleach or Ammonia)
- Condensation Rings (From sodas or juices)
Etching is not a stain; it is a physical change in the stone’s texture. Think of it as a burn that alters the finished top layer. This is why marble cleaner must always be pH-neutral. Using ammonia-free Windex or mild dish soap ensures you don’t accidentally cause the very damage you are trying to avoid.
Preventing Future Damage to Your Marble Furniture
The best defense for natural stone is a proactive offense. Since it is nearly impossible to avoid acidic materials in a living room setting, you must employ effective barrier methods.
Proper lighting can also help you spot these marks early; learn how to decorate your room with lights to highlight your furniture’s best features.
| Prevention Tool | Benefit |
|---|---|
| Coasters | Prevents condensation rings from acidic beverages. |
| Trivets | Protects from heat and spills. |
| Large Cutting Boards | Acts as a secondary work surface for food. |
| Decorative Trays | Catches spills from bottles or carafes. |
If a spill occurs, follow the Immediate Response Protocol: blot the stain, do not wipe it. Wiping spreads the acidic liquid over a larger area. Use a paper towel to absorb the liquid vertically.
While sealers help prevent stains, they cannot stop the acid from eating the stone if left for too long. Everyday maintenance with warm water is your best friend.
Choosing Your Aesthetic: Polished vs. Honed Finishes
Your choice of marble finish determines how visible etching will be. A polished finish provides a high-gloss, reflective surface that many find luxurious. However, because it is so shiny, a dull spot stands out like a sore thumb.

Conversely, a honed finish has a matte look. It is velvet-like and less reflective. The benefit here is that etching is less visible because the stone is already dull by design.
If you choose a honed finish, you can often remove etch marks simply by buffing the area with a mild dish detergent and water solution. Living with patina—the natural aging of the stone—is often easier with a honed surface.
Specialized Comparison: Repairing Marble vs. Granite Etching
It is vital to distinguish between Marble and Granite, as the repair logic differs. While etching occurs on marble, limestone, and travertine frequently, it is rarer on granite.
Granite’s unique requirements involve a more aggressive approach. To repair etched granite, you must first remove the finish using 120-grit sandpaper. Once the area is dull and the texture of the stone is felt, you use clear epoxy (a thermoplastic adhesive) to fill the etches.
Use a putty knife to smooth out the epoxy and ensure it is pushed deep into the etch. After a 24-hour cure time, you sand the hardened epoxy and apply a granite finish or polisher. Unlike marble, which uses polishing powder, granite restoration relies on the adhesion of epoxy resin to restore the surface.
Frequently Asked Questions
Can I use vinegar or lemon juice to clean my marble table?
No. Vinegar and lemon juice are acidic materials that will cause etching on natural stone. Marble contains calcium carbonate, which reacts with these acids to create dull spots. Always use pH-neutral cleaners.
Is an etch mark the same as a stain?
No. Etching is an actual changing of the stone, similar to a chemical burn that removes the surface finish. A stain occurs when a liquid penetrates the pores and changes the color. Etching is more likely to occur on marble and limestone.
Does sealing marble prevent etching?
Sealers will help to prevent stains, but they will not prevent etching. The sealant buys you time to clean up acidic liquid spills, but the chemical reaction between acid and calcium carbonate can still occur on the surface level.
How do I know if an etch is deep enough to require professional help?
If the etch mark feels rough to the touch or looks like a pitted crater, it is a deep etch. These require wet sanding with diamond abrasives (from 400 to 3000 grit). If you are concerned about creating an uneven surface, consult a professional.
Conclusion
Restoring a marble coffee table is a rewarding DIY project that preserves your furniture’s value. By understanding the chemical nature of calcium carbonate, you can effectively remove etching from marble. For more interior care tips, visit luxelivinginsights. Please share your restoration stories or leave a comment below!