The easiest way to get pendants “designer-right” is to start with one simple rule: hang kitchen island pendant lights so the bottom sits about 30-36 inches above the countertop, then adjust for ceiling height, sightlines, and fixture scale. To begin, you’ll learn exactly what this rule means and why it works.
Next, we’ll calculate the right pendant drop for high ceilings (9-foot, 10-foot, and taller), so your lights don’t feel like they’re floating too high or hanging low enough to block the view across the kitchen.
After that, you’ll see how to measure and mark height correctly before you commit to wiring, and how to test placement with a quick mock-up so you can avoid redoing holes in the ceiling.
Below, we’ll cover spacing, pendant count (2 vs 3), fixture size, and the most common height mistakes then finish with special cases like vaulted ceilings and extra-long islands.
What is the 30-36 inch rule for kitchen island pendant light height?
The 30-36 inch rule means you hang pendant lights so the bottom of the pendant is 30 to 36 inches above the countertop, because this clearance balances three priorities at once: comfortable sightlines, strong task lighting, and a visually proportional drop.
To connect that definition to real kitchens, think of the rule as a “safe starting range,” not a rigid commandment. Most islands become functional and visually open when you stay in that band then you shift slightly depending on ceiling height, pendant size, and whether you have seating.

Is the 30-36 inch rule measured from the countertop or the floor?
Yes the 30-36 inch rule is measured from the countertop for three reasons: (1) countertop height is the consistent reference point across kitchens, (2) the clearance you feel while working and seeing across the island happens above the counter, and (3) floor-to-pendant measurements vary when floors, countertops, and cabinets differ.
To convert the rule to a floor measurement, add your countertop height. For example, if your countertop is ~36 inches high, a 30–36 inch clearance places the pendant bottom roughly 66–72 inches from the floor. This conversion is helpful when you’re marking a temporary string drop from the ceiling.
Does the 30-36 inch rule apply to all pendant styles (shades vs bare bulbs)?
Yes, the rule applies to most pendant styles for three reasons: (1) it protects sightlines in open kitchens, (2) it keeps task lighting close enough to be effective, and (3) it creates a consistent “visual rhythm” over islands. However, the exact measurement point changes by style.
Here’s how to measure “the bottom” so the rule stays accurate:
- Shaded pendants (drum, cone, dome): measure to the bottom edge of the shade.
- Globe pendants: measure to the lowest point of the globe, not the socket cap.
- Bare-bulb pendants: measure to the bottom of the bulb tip if it hangs lower than the socket.
- Multi-tier pendants: measure to the lowest visual element so you don’t accidentally hang “too low.”
Practical takeaway: if the pendant has a visible bulb that hangs below the shade line, you still want the lowest point to remain within the 30–36 inch clearance band to avoid eye-level glare.
How do you calculate pendant height for 9-foot and 10-foot ceilings (high ceilings)?
Calculate pendant height for high ceilings by starting with the 30-36 inch clearance and then adjusting slightly higher as ceiling height increases, because taller rooms can visually “swallow” short drops and make pendants feel underscaled or disconnected from the island.
To keep this decision practical, you’re optimizing two things at the same time: the pendant should feel visually anchored to the island (not floating), and it should never block the natural view across the kitchen especially when people are seated at the island.

How much higher should you hang pendants for each extra foot of ceiling height?
A practical approach is to raise the pendant bottom by about 2–3 inches for each extra foot above an 8-foot ceiling, because that small increase preserves openness while keeping the pendant visually proportional in a taller volume.
To apply this without confusion, use this simple “starting point” framework:
- 8-foot ceiling: start at ~30–36 inches above the countertop.
- 9-foot ceiling: start at ~32–39 inches above the countertop (then refine based on pendant size).
- 10-foot ceiling: start at ~34–42 inches above the countertop (especially if pendants are large or the island is long).
Important nuance: you don’t raise pendants forever. If you go too high, the light becomes less useful for tasks, and the pendants can feel like “ceiling decor” rather than island lighting. That’s why your next step is always a sightline test.
What pendant height works best over seating vs prep zones on an island?
Pendants work best a little higher over seating sightlines, slightly lower over prep zones, and most balanced when you choose a middle height that suits both because seated guests look through the island zone, while prep work needs brighter, closer task lighting.
To choose your final height, decide which function dominates:
- Seating-first island: lean toward the higher end of your clearance range to keep faces visible and conversations open.
- Prep-first island: stay closer to the standard 30–36 inch rule so the counter is well illuminated.
- Mixed-use island: choose a mid-range clearance, then rely on dimmers and bulb selection to fine-tune brightness.
Quick test: sit at the island and look across the room. If the pendant cuts through eye level or makes the space feel visually chopped, raise it slightly or choose a pendant with a less bulky shade profile.
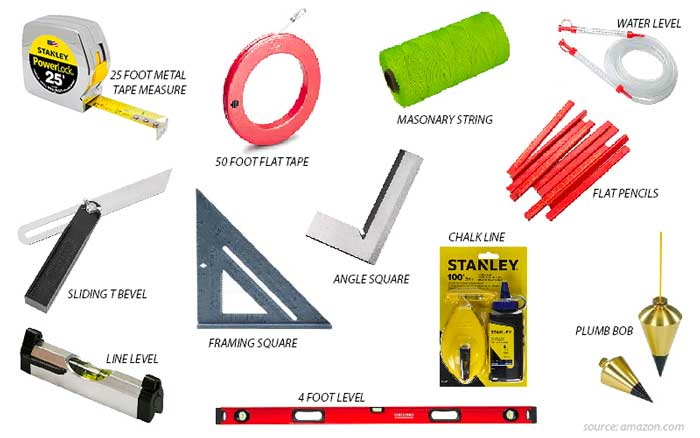
Where exactly should you measure and mark the hanging height before installation?
Measure and mark pendant height by choosing your target clearance (30–36 inches), identifying the pendant’s lowest point, and then marking ceiling locations and drop length before wiring, because most “I hung it wrong” problems come from measuring the wrong reference point.
To begin, treat measurement as a repeatable workflow: first define where the pendant will visually “end,” then locate centers over the island, then test the drop temporarily so you can adjust without drilling new holes.
Marking workflow (works for most kitchens):
- Confirm countertop height (commonly ~36 inches, but measure yours).
- Choose your target clearance (start at 30–36 inches; adjust for high ceilings if needed).
- Identify the pendant’s lowest point (shade edge, globe bottom, or bulb tip).
- Compute bottom-from-floor height (counter height + clearance) to visualize the drop.
- Mark ceiling center points for each pendant (aligned to island and layout).
- Mock-up the drop with string/tape before final wiring.
Should pendant bottoms align in a straight line when you have multiple pendants?
Yes, pendant bottoms should usually align in a straight line for three reasons: (1) consistent bottom heights look intentional and “designer,” (2) alignment keeps light distribution even across the island, and (3) mismatched drops create visual noise that makes the kitchen feel less polished.
However, you can break this rule intentionally when you’re using deliberately staggered pendants as a design feature (for example, a cascading stairwell look). Over a kitchen island, straight alignment is almost always the safest choice.
How do you test pendant height before you hardwire (tape + mock-up method)?
Test pendant height by using a tape-and-string mock-up in 3 steps mark the ceiling point, hang a string to the target bottom height, then simulate pendant size because seeing the drop in real space is faster and more accurate than guessing from measurements alone.
To do the mock-up like a pro:
- Hang painter’s tape on the ceiling where the pendant canopy will sit.
- Attach a string and measure down to your target bottom height (e.g., 66–72 inches from floor for many kitchens).
- Simulate pendant volume using a paper circle or lightweight cardboard cut to the pendant diameter, taped near the bottom of the string.
Then do two checks: stand at the sink and look across the room (sightlines), and stand at the island where you prep (task lighting feel). If either feels wrong, adjust the string by 1–2 inches and retest.
How far apart should kitchen island pendant lights be spaced for balance and function?
There are 3 spacing priorities for island pendants balanced symmetry, comfortable clearance, and proportional scale and you achieve them by spacing pendants evenly, keeping them away from island edges, and factoring pendant diameter into center-to-center distance.
Next, you’ll translate “looks balanced” into a simple layout rule: spacing is not just about inches between cords; it’s about where light lands on the countertop and how the pendants frame the island visually.

What is the standard center-to-center spacing between pendants (in inches)?
A common standard is about 24-30 inches center-to-center, adjusted by pendant size, because this spacing usually prevents visual crowding while maintaining consistent light coverage across the island.
To set spacing that fits your pendants (not just a generic number), use this quick method:
- Start with diameter: larger pendants need more breathing room.
- Aim for visual separation: you want noticeable space between shades, not “touching” silhouettes.
- Protect edge clearance: keep pendants inward from island ends so they don’t feel like they’re hanging over corners.
Practical rule: if your pendants are wide statement pieces, you may use fewer pendants with wider spacing; if your pendants are slim, you can use more with tighter spacing.
2 pendants vs 3 pendants: which layout looks better on your island length?
Two pendants win for medium islands and larger fixture diameters, three pendants look best for long islands and slimmer fixtures, and four pendants can work for very long islands because pendant count must match island length and visual rhythm.
To choose confidently, use an island-length mindset:
- Choose 2 pendants if your island is moderate length or you want bold, oversized pendants.
- Choose 3 pendants if your island is long, your pendants are smaller, or you want an even “beat” of light across the countertop.
- Consider 4 pendants only when the island is very long and the pendants are narrow otherwise the ceiling can look cluttered.
The simplest visual check: step back and look at the island as one rectangle. Your pendants should frame the rectangle evenly and avoid leaving a “dead zone” of light at one end.
What pendant size and shape affect the “right” hanging height (diameter, shade depth, glare)?
There are 3 key size-and-shape factors that change the “right” height pendant diameter, shade depth, and glare control because big or deep pendants feel lower at the same clearance, and clear glass or bare bulbs can become uncomfortable if they sit in your line of sight.
Next, you’ll see how pendant proportions influence the final number you pick inside the 30–36 inch range (or slightly higher for tall ceilings). The goal is not just clearance it’s comfort and visual balance.

Do oversized pendants need to hang higher or lower than small pendants?
Oversized pendants usually look better slightly higher than small pendants, because their larger diameter and visual weight can make them feel intrusive if they sit too low especially in open-concept kitchens where the island is a major sightline.
To refine height for oversized fixtures:
- Start at the higher end of your clearance range (or slightly higher for 9–10 ft ceilings).
- Check stool sightlines (sit down and look out; oversized shades can block faces if too low).
- Confirm task lighting (if it feels dim, use brighter bulbs or add under-cabinet lighting rather than dropping pendants too low).
In practice, oversized pendants “read” best when they feel like they frame the island rather than interrupt it.
Glass vs metal vs woven shades: which materials tolerate lower hanging heights?
Metal and woven shades tolerate lower heights best, glass is more sensitive to glare and bulb visibility, and open/bare-bulb designs require the most careful placement because material determines how the light is diffused and whether the bulb is visible at eye level.
Use this comfort-first guide:
- Metal shades: good glare control; you can stay closer to the standard range without discomfort.
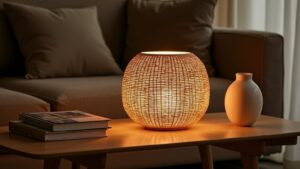
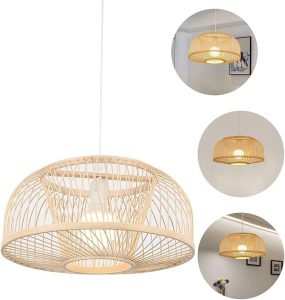
- Woven/rattan shades: soft diffusion; visually warm; often forgiving at standard heights.
- Clear glass: beautiful, but glare-prone; consider hanging slightly higher or choosing frosted bulbs.
- Bare bulb: can feel harsh if low; prioritize higher placement and dimming.
Practical tip: if you see the bulb directly while seated at the island, it will likely feel too low or too bright dimming and slightly raising can fix that quickly.
What are the most common pendant height mistakes and how do you fix them fast?
There are 5 common pendant height mistakes too low, too high, uneven drops, wrong scale, and glare and you can fix most of them by adjusting the drop length, re-leveling, improving bulb/dimming choices, or changing pendant count rather than starting over.
Next, you’ll learn to diagnose mistakes using symptoms. This makes corrections simple: once you know whether your issue is sightlines, brightness, or proportion, the fix becomes obvious and fast.

Are pendants too low if they block your view across the island?
Yes, pendants are too low if they block your view for three reasons: (1) they disrupt open-concept flow, (2) they make the island feel crowded, and (3) they can create uncomfortable glare or visual “clutter” at eye level especially when people are seated.
To fix “too low” fast:
- Raise the drop by 1–3 inches and retest sightlines.
- Reduce glare with dimming, softer bulbs, or a shade change instead of hanging lower for brightness.
- Reconsider scale if oversized pendants dominate the space; fewer or smaller pendants may work better.
How do you fix pendant heights after installation (rod/chain adjustments)?
Fix pendant heights after installation by adjusting the drop in 3 steps power off, reset rod/chain length, then re-level and test because most pendants are designed to be adjusted and corrected without moving the electrical box.
A safe, practical adjustment checklist:
- Turn off power at the switch (and breaker if you’re opening the canopy).
- Open the canopy carefully and note how the cord is secured.
- Adjust the drop by swapping rods, re-linking chain, or shortening/lengthening cord (depending on fixture type).
- Re-level the fixture so the bottom edges align.
- Restore power and test from standing and seated positions.
What special ceiling conditions and advanced lighting choices change pendant height decisions?
Special ceilings and advanced lighting choices change pendant height decisions when they affect alignment, glare, brightness, or visual rhythm because a vaulted ceiling, an open-concept sightline, or an ultra-bright bulb can make a “correct” clearance feel wrong in real life.
To keep this section useful, each topic below pairs a real-world condition with a practical adjustment so you can keep the island looking intentional instead of improvised.

Vaulted or sloped ceilings: do pendants need a different drop and canopy setup?
Yes, pendants often need a different setup on vaulted ceilings for three reasons: (1) the canopy may need a slope adapter to sit flush, (2) the drop must be judged by visual level rather than ceiling distance, and (3) multiple pendants must align at the bottom even when ceiling angles differ.
To handle vaulted ceilings cleanly:
- Use a compatible canopy (swivel or slope-rated) so the fixture hangs straight.
- Align bottoms to a consistent height (use a laser level or measured string drops).
- Protect the 30-36″ clearance logic by measuring from the countertop, even if the ceiling is angled.
Open-concept kitchens: should pendants align with nearby chandeliers or recessed lighting lines?
Yes, alignment often improves the look in open-concept kitchens for three reasons: (1) it creates a consistent ceiling “datum line,” (2) it reduces the feeling of random fixture drops, and (3) it helps the island lighting feel integrated with dining or living zones.
However, don’t sacrifice island comfort just to match another fixture. A better strategy is to align visually where possible (similar drop lengths, complementary scale) while keeping the pendant bottoms within a comfortable clearance range for island function.
Dimmers and bulb brightness: can lighting output make pendants feel “too low”?
Yes, lighting output can make pendants feel too low for three reasons: (1) harsh brightness increases glare at eye level, (2) exposed bulbs become visually dominant, and (3) high contrast draws attention to the pendant “mass” rather than the room.
To fix the “too low” feeling without changing the height:
- Add dimming so you can reduce brightness during dining or evenings.
- Choose diffused bulbs or shades to soften glare.
- Use layered lighting (under-cabinet + recessed) so pendants don’t have to do all the work.
Extra-tall ceilings (11-14 ft) or extra-long islands: when do you use 3-4 pendants instead of hanging lower?
Use 3-4 pendants instead of hanging lower when you need coverage and rhythm across a long island, because dropping pendants too far can block sightlines, look heavy, and still fail to distribute light evenly from end to end.
A simple decision rule:
- If the island is long: add pendants (or increase fixture count) to spread light, rather than lowering one or two fixtures dramatically.
- If the ceiling is very tall: choose fixtures with presence (larger diameter, taller profile) and keep clearance comfortable then use additional light layers if needed.
- If the design feels cluttered: consider fewer, larger pendants plus recessed/under-cabinet lighting for balance.
Summary: in extra-large spaces, you almost always get better results by scaling fixture count or fixture size not by sacrificing clearance.
Safety note: If adjusting hardwired fixtures requires opening the canopy or modifying wiring, consider a licensed electrician especially on high ceilings.
Source:
- https://www.decksgo.com/images/measurement-tool.jpg
- https://img.thesitebase.net/files/10410840/2025/03/05/17411590198e0cb24ac4.png